Suscripción al boletín
Introduzca su dirección de correo electrónico y suscríbase a nuestro boletín.
Introduzca su dirección de correo electrónico y suscríbase a nuestro boletín.
Herramientas gratuitas


Modelos de moda AI
Mostrar trajes en modelos de IA

Fotos de limpieza
Eliminar objetos no deseados

Cambiador de fondo
Fondos instantáneos generados por IA

Intercambio de caras
Cambia cualquier cara al instante

Ropa Recolor
Sustituye el color en 1 clic

Recopilación de imágenes
Consigue fotos libres de derechos de reimagine

Eliminador de fondo
Fondo transparente o de cualquier color

Mejorador de fotos
Mejorar la calidad de imagen
Descargar APP
If you are a professional photographer, chances are that you must have seen dust spots on your photos. It can be heartbreaking for any photographer as these dust spots can degrade the overall quality of your pictures. From shooting in actual dust storms to having dirty camera sensors, there could be plenty of reasons for it. Thankfully, with a reliable dust remover tool, you can make your photos look professional and spotless again. In this post, I will let you know how to remove dust from your photos in two different ways.
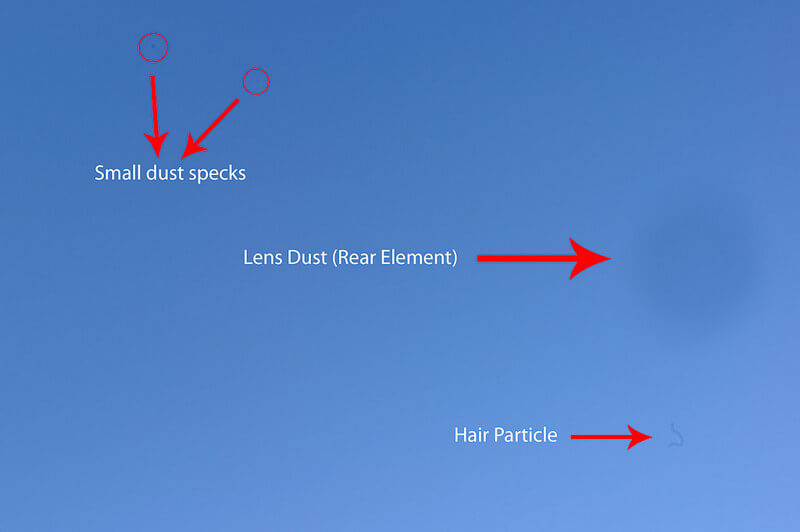
To understand this concept, let’s start with the basics. Ideally, when light passes through your camera’s lens, it can scatter or refract off dust particles, which can degrade your photography output. Here are a couple of ways it can affect the output of your camera.
Reduction in sharpness and detailing
When dust particles are scattered, it can result in a loss of sharpness and detail in the captured image. This effect is particularly noticeable in areas of the photograph with fine textures or intricate patterns.
Formation of dark spots
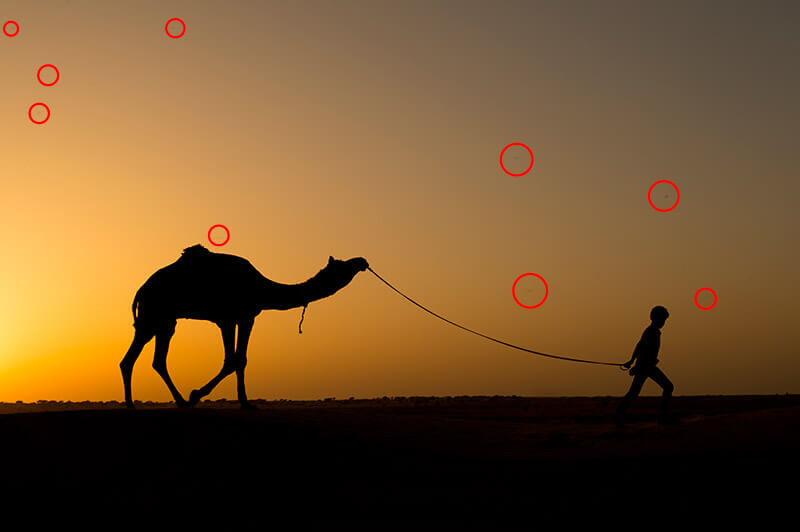
Dust particles present on the camera sensor or lens surface can cast shadows on the sensor, leading to the formation of visible spots in the image. These spots appear as dark specks or blemishes on the photograph, affecting its overall clarity and quality.
Color accuracy
Similarly, dust particles can affect the contrast and color accuracy of an image by absorbing or diffusing light unevenly across the sensor. This can result in a loss of vibrancy and originality of colors in your photos.
Increased noise
Accumulation of dust on the sensor can contribute to the generation of noise in areas with low light or smooth gradients. This can also create unwanted visual distortions in your image.
Long-term damage
If left unchecked, the accumulation of dust in your camera body or lens can potentially cause mechanical damage. Dust particles may settle on delicate internal components, leading to increased friction and malfunction.
Before I let you know about various dust remover solutions, it is important to know why dust accumulates on photos in the first place. Consider the following reasons for having dust spots, so that you can simply avoid them beforehand.
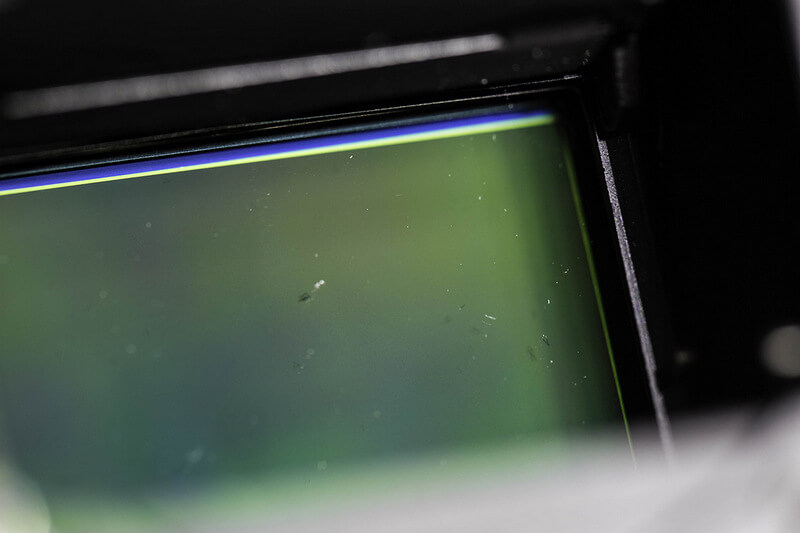
Dirty camera sensors
This is one of the most common reasons for having dust spots on photos. Ideally, during the changing of lenses or exposing the camera sensor to the environment, dust particles can settle on the sensor’s surface. Even a small amount of dust on the sensor can result in noticeable spots on captured images, particularly when shooting at narrow apertures or with uniform backgrounds.
Environmental factors
The environment in which a photograph is taken can significantly contribute to the presence of dust spots. For instance, outdoor settings in dry or windy conditions tend to have more airborne dust particles.
Lens and camera body
You might not notice, but dust can accumulate not only on the camera sensor but also on the lens elements and within the camera body. When attaching or removing lenses, dust particles can be introduced into the camera system, potentially settling on the sensor or other optical surfaces.
Old photographs
Over time, photographs stored in less-than-ideal conditions may collect dust particles from the surrounding environment, resulting in the formation of visible spots or blemishes on the image.
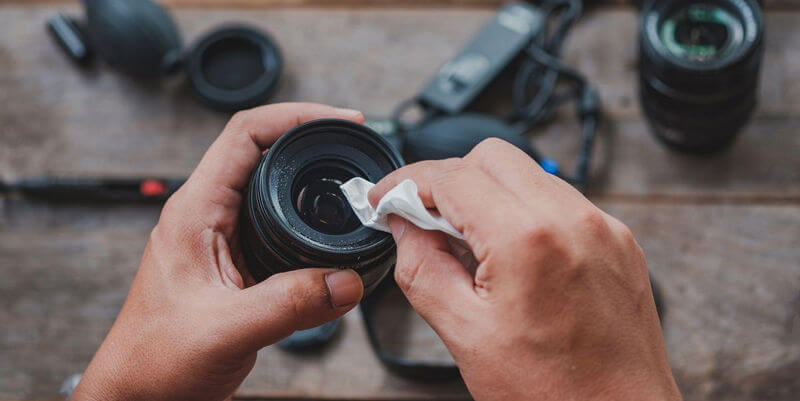
Camera maintenance
Needless to say, neglecting regular camera maintenance, such as cleaning the sensor, lens elements, and camera body, can intensify the occurrence of dust spots on photos.
After clicking a professional photo, you realize that it has got visible dust spots. In this case, you should remove dust from the photo due to the following reasons:
Maintaining image clarity
Professional photographers strive to capture images with impeccable clarity and definition, and eliminating dust is essential to achieving this standard. That is, removing dust ensures that the end results are sharper and more detailed.
Preserving color accuracy
By removing dust, photographers can ensure that colors appear true to life and maintain their intended vibrancy. This is particularly crucial in eCommerce, where color fidelity is important for accurately representing the product.
Avoiding post-processing challenges
Images containing dust spots often require extensive post-processing to correct imperfections, which can be time-consuming and labor-intensive. By removing dust at the source, photographers can streamline their post-processing efforts and minimize the need for editing.
Protecting equipment and longevity
Dust particles can accumulate within camera bodies and lenses, leading to mechanical issues and decreased performance over time. Therefore, by keeping equipment clean and free of dust, photographers can extend the lifespan of their gear and ensure consistent, high-quality results throughout their careers.
Even if you have got dust spots on your photos, you can get rid of them in post-production. For instance, with the help of Adobe Photoshop, you can get rid of dust particles, dark spots, scratches, etc. from your images. While using the Photoshop dust remover tool is a bit complicated, you can meet your requirements by following this stepwise tutorial:
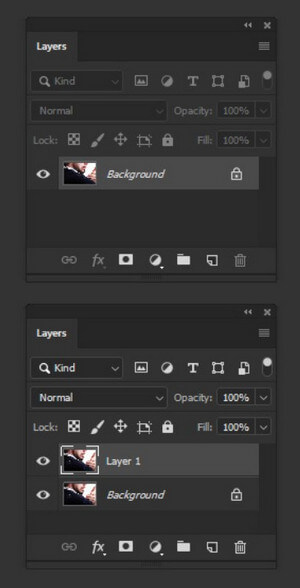
Step 1: Load your image on Photoshop and duplicate the background layer
To start with, you can just launch Adobe Photoshop and open the image containing dust spots that you want to remove.
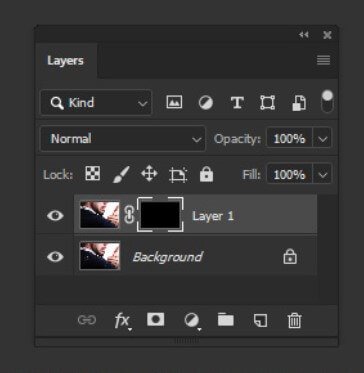
Now, in the Layers panel, right-click on the Background Layer and select the Duplicate Layer option. This will create a copy of the original image, which serves as an editing layer. You can also do this by pressing Ctrl + J on your system.
Step 2: Zoom in to identify dust spots
Afterward, you can use the Zoom tool in Photoshop to zoom in on areas of the image where dust spots are visible. You can do this by just clicking on the zoom icon on the panel or by pressing the “Z” key.

Step 3: Select the Dust & Scratches feature
Great! Once you have identified the dust spots, you can select the copied layer and go to Filter > Noise > Dust & Scratches. This will provide dedicated options for you to select dust spots and fix them.
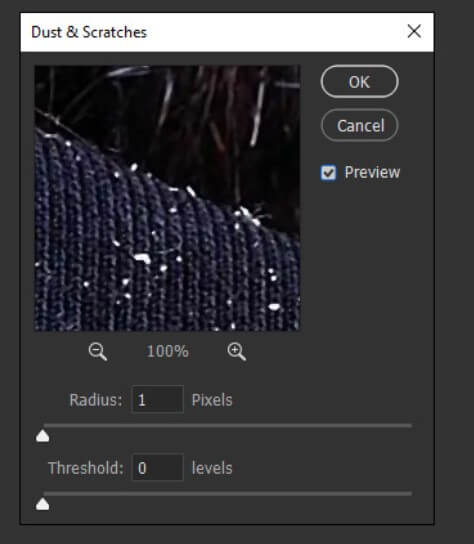
Step 4: Fix dust spots on your photo
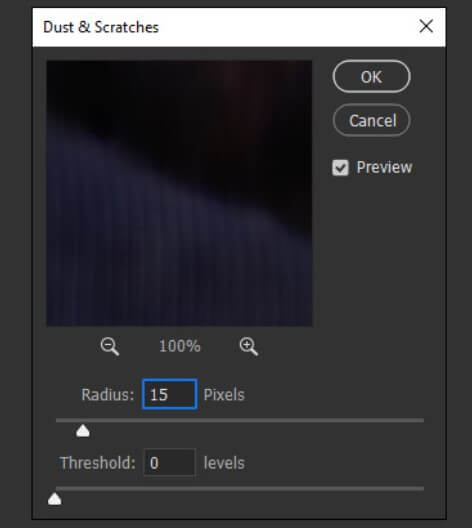
In the Dust & Scratches window, you can first select an appropriate radius for the image. You can manually select the radius in such a way that it would cover the respective dust spot that you want to remove.
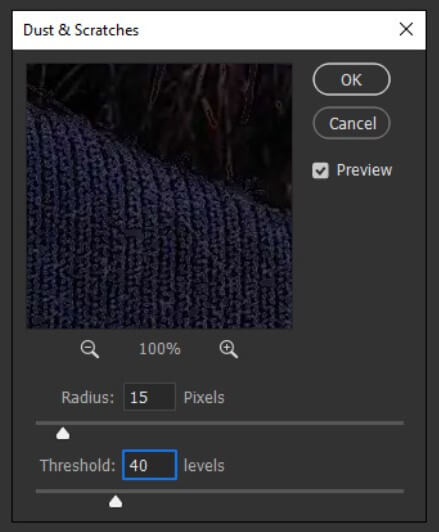
Afterward, you can go to the Threshold feature to manually set up a level of threshold you want to fix. This would largely depend on the radius and the intensity of the dust spot.
Once that is done, you can go to the side panel and click on the Layer > Layer Mask > Hide All.
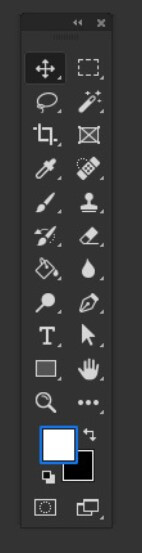
After hiding the layer, you have manually set the foreground color to white.
Step 5: Make final adjustments and export your photo
To make final changes, you can select the Brush Tool from the panel and pick a soft round brush from the top toolbar.
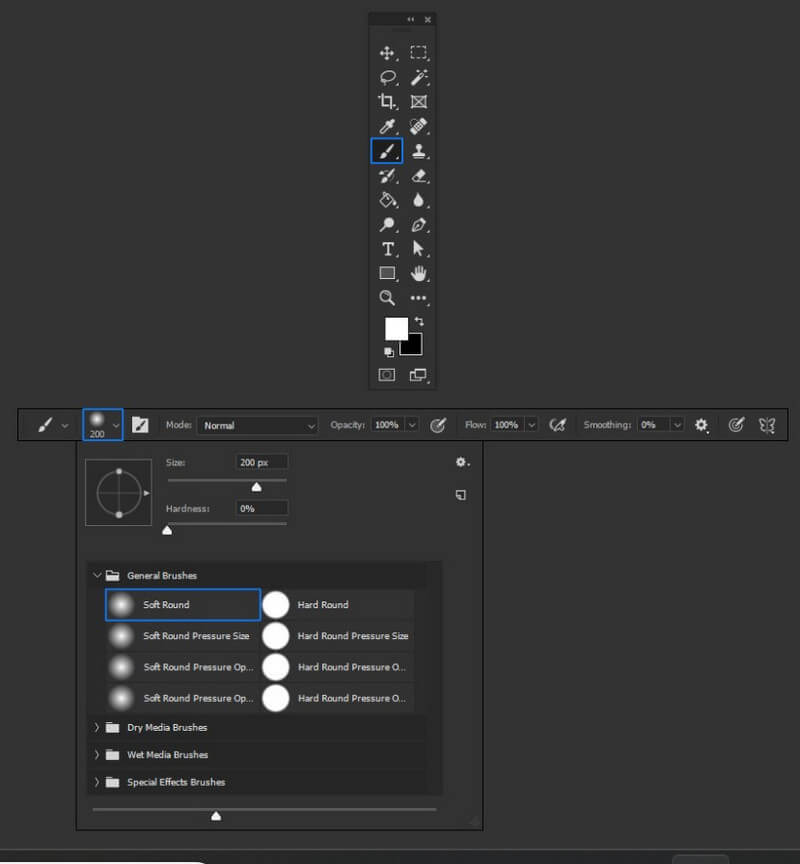
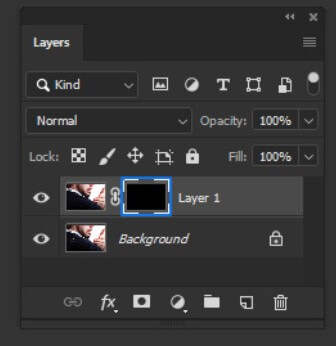
You need to make sure to have the Layer Mask option selected from the Layer Panel. That’s it! You can now just paint over the part of your image that had dust spots and get rid of them one by one.
In this way, you can manually remove dust from your photo and can later export it in the desired format.
As you can see, using Adobe Photoshop or any other editing tool to remove dust on your photos can be time-consuming and tedious. If you don’t want to go through so much hassle and want instant results, then you can take the assistance of an AI-powered tool like iFoto Limpieza Fotos.
To use the iFoto dust remover application, you can simply go through the following 3-step process:
You can start by visiting the iFoto web or mobile application and uploading the image of your choice. You can either drag and drop your original image to iFoto or browse it from the location on your system.

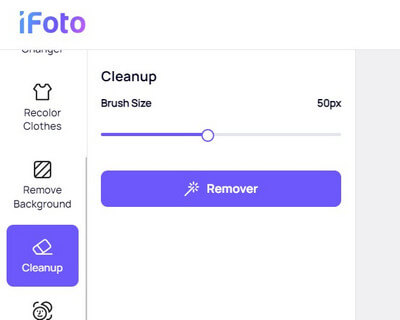
After the photo is uploaded on iFoto, you can preview it on the side. Now, you can just use the brush tool and use it to cover dust spots on the image. Alternatively, you can select any other object that you want to clean-up from your photo here.

Once you have selected the designated area, just click on the “Remover” button on the side panel. From here, you can also adjust the radius of the brush on iFoto.
Now, iFoto will take a few seconds to automatically detect the object and process its AI algorithm to get rid of the image.

That’s it! Once the object is removed and the process is completed, you can preview the results on iFoto. You can now just click on the “Download” button to save the edited image from iFoto to your local storage.

You might be wondering whether to use Photoshop or iFoto as a dust remover tool. In that case, you can simply go through the following quick comparison.
| Photoshop | Limpieza de iFoto | |
| Facilidad de uso | Complex interface, requires some learning curve | Simple and intuitive, easy for beginners |
| Dust removal process | Manual selection and adjustment of dust spots | Automatic detection and removal with AI |
| Time | Time-consuming, especially for detailed editing | Instant results (saves time and effort) |
| Precisión | Since it requires manual efforts, results are not that accurate | Highly precise and AI-powered accurate results |
| Availability | Desktop | Web, iOS, and Android |
| Cálculo de costes | Pagado | Gratis |
By now, you can easily learn how a dust remover solution works. Though, to avoid so much post-production hassle, you can consider these tips and prevent the occurrence of dust spots on images:
As you can see, with the right dust remover tool, you can easily get rid of dark spots or unwanted things from your photos. While a manual tool like Photoshop requires a lot of time and editing background, iFoto Cleanup can produce instant, reliable results. It is powered by the latest AI models that can remove dust, text, people, or any other object from your images on the go. Feel free to give it a try and explore other tools of the iFoto Studio as well to meet your visual editing needs in no time!