Suscripción al boletín
Introduzca su dirección de correo electrónico y suscríbase a nuestro boletín.
Introduzca su dirección de correo electrónico y suscríbase a nuestro boletín.
Herramientas gratuitas


Modelos de moda AI
Mostrar trajes en modelos de IA
Fotos de limpieza
Eliminar objetos no deseados
Cambiador de fondo
Fondos instantáneos generados por IA
Intercambio de caras
Cambia cualquier cara al instante
Ropa Recolor
Sustituye el color en 1 clic

Recopilación de imágenes
Consigue fotos libres de derechos de reimagine
Eliminador de fondo
Fondo transparente o de cualquier color
Mejorador de fotos
Mejorar la calidad de imagen
Descargar APP
This article covers the setup and uploading of product images on Shopify. After the system update, the section for uploading product images has been renamed to “Media,” which means you can now not only upload product images but also videos and 3D models, offering more ways to showcase products. However, the ultimate goal remains the same: converting traffic into orders.
Shopify supports most image file formats, with PNG, JPEG, and GIF being the recommended ones. Other image formats such as PSD, TIFF, BMP, HEIC, and WebP are also supported. The following are the recommended product image formats by Shopify:
JPEG/JPG images are suitable for displaying relatively rich and complex static images, such as photographed pictures. JPEG/JPG images are rich in color and can maintain image quality while ensuring display effect, that is, lossless compression of images. This ensures both image display effect and website opening speed by reducing the file size. In the same file size, the color of JPG images is significantly brighter than GIF and PNG.
Therefore, both Shopify and the author of “10 Must Know Image Optimization Tips” consider JPG format images as the first choice for product images on independent e-commerce sites. “The best file type for product images is .jpg.” GIF images should be avoided as much as possible. However, if necessary, you can create some GIF animations to insert into product descriptions to increase the order conversion rate, provided that you control the size of GIF images to ensure good website performance.
Therefore, JPEG/JPG images are suitable for product images, website banners, carousel images, website pages, and blog post images.
PNG images are the ideal format for graphic icon files and also support transparency, making them suitable for images such as logos on websites and social icon files.
WebP Format Images When creating product images, there is no need to deliberately create WebP format files for upload to Shopify. Shopify’s Imagery service will automatically display images in the best available format based on the browser supported by the customer.
For example, if we open any page of a Shopify website using the Google Chrome browser, Shopify will automatically replace all JPG format images on that page with “WebP” format images. If you visit the same page using a browser that does not support the “WebP” format, such as IE browser, all the images on that page will still be in JPG format. The reason why Shopify automatically converts images to JPG format or WebP format is that these types of files can achieve optimization in terms of color rendering and file size, which is the opening speed. The entire process is completed by Shopify, and we do not need to do anything.
WebP is an image format developed by Google to speed up image loading. The compressed size of the image is about 2/3 of JPEG, which can save a lot of server bandwidth and data space. It can reduce the size of image loading resources, save user traffic resources, and reduce server traffic resources. Because it is a service developed by Google, its compatibility is not so comprehensive. However, we do not need to worry about this, as Shopify will automatically decide whether to display JPG format images or Webp format images based on the customer’s browser environment.
We can try to open our product page with Google Chrome browser, and then download an image. Usually, the default saved file format is WebP, even if the format of the image we uploaded is JPG or PNG.
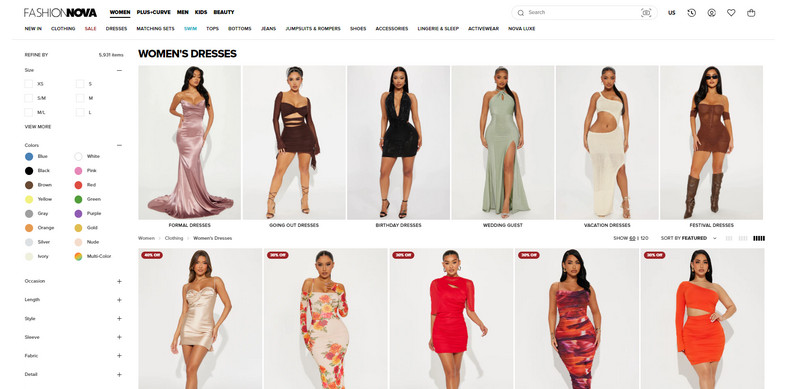
It’s not necessary for the image size to be square. For example, the product images on the Fashion Nova website are all rectangular with consistent aspect ratios. This display effect can be better, especially for clothing, as it can fill the entire screen of a mobile phone. When you open the product link, the entire screen displays the product image, which creates a much better visual impact.
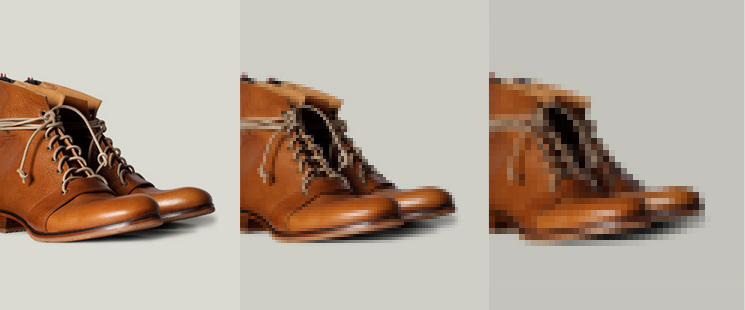
The higher the pixel count of a product image, the clearer it will appear. However, higher pixel counts typically mean larger image files, which can slow down website loading times. Therefore, a balance needs to be found between pixel count and file size.
Images uploaded to a Shopify website have limitations on both pixel dimensions and file sizes. Any file exceeding the following limits will display an error when uploaded:
To achieve high-quality photos, we may need to use image editing tools to optimize and resize them for the web. Larger images can lead to slower page loading times. The ideal image size should not exceed 200KB, and smaller is better.
When compressing images, be careful not to compress them excessively, as this can lead to the appearance of spots.
You may have heard that if a website doesn’t open within 3 seconds on a desktop computer, many people will choose to leave; on mobile devices, this time increases to 5 seconds. According to a data study by Amazon, if their website loads 1 second slower, they lose approximately $1.6 billion in sales per year. In Google’s ranking algorithm, website loading speed is also one of the important factors for achieving a higher ranking.
Therefore, if your website loads slowly, most people will choose to close the page before it finishes loading, which means there will be no conversion to orders. Although Shopify uses various webpage acceleration technologies, such as CDN technology and image compression technology, if your website needs to load many large files, such as the commonly used 2MB size banner images and large product images, these will still be important factors affecting the website loading speed.
Therefore, it is recommended to control the size of image files while ensuring image quality. There are many tools for this purpose, such as Tinypng. Here are a few recommended compression tools you can try:

To speed up website loading, reduce page load times, and store more images in a specific number of disks, Shopify compresses images that meet specific requirements under specific conditions. Image compression may result in changes in image quality. The resolution of the compressed image is related to the resolution of the image you uploaded and the image size. Usually, the resolution of the compressed image after compression is as follows:
The specific resolution of the image can be viewed and adjusted using PS (shortcut Ctrl+Alt+I). As shown in the figure below, the resolution “72” in the figure is the DPI value of the image.
Shopify Store Product Image Requirements and Image Optimization
For JPEG format files, Shopify will decide whether to compress the image based on the original image resolution. For example, if the resolution of the image we upload is greater than 86, and either side of the image is greater than or equal to 1024px, then Shopify will compress the image, and the resolution of the compressed image will be 85.
If the resolution of the image before uploading is between 65-85, and either side of the image is greater than or equal to 1024px, then Shopify will not process the image in any way, and Shopify will use the original image you uploaded.
| Original Resolution | Image Size | Compressed Resolution |
|---|---|---|
| 86 or higher | Image width or height >= 1024px | 85 |
| 65 – 85 | Image width or height >= 1024px | Original quality |
| 64 or lower | Image width or height >= 1024px | 65 |
| 76 or higher | Image width and height < 1024px | 75 |
| 65 – 75 | Image width and height < 1024px | Original quality |
| 64 or lower | Image width and height < 1024px | 65 |
Regarding how to take good product photos, because the content involved is too professional, I currently do not have the ability to explain it thoroughly. However, taking good product photos has a very positive and important impact on us for running independent websites and increasing website conversion rates. It is recommended that everyone ask Google more. There is a saying: in e-commerce, what is actually sold is images. But what I know is that for independent websites, you do not have to comply with Amazon’s requirements for product images. The main image must not be a white background image, but a scene image of the product.
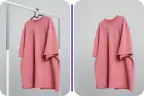
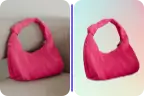
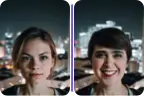
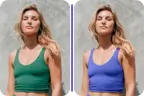
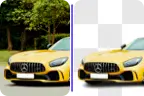
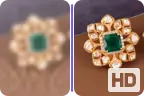
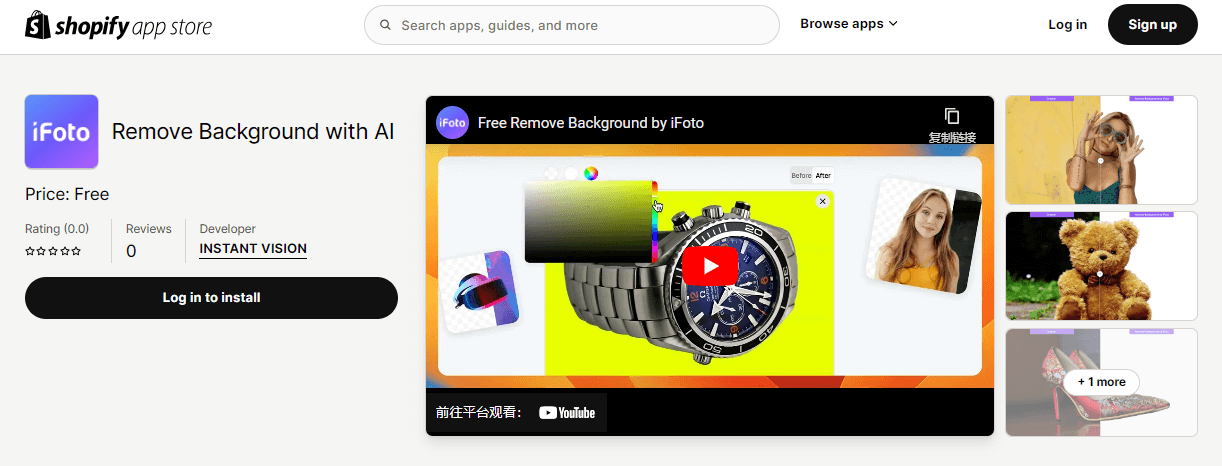
Editor de fotos iFoto is a cutting-edge image editing tool that leverages advanced AI technology to enhance image resolution efficiently, ensuring high-quality outputs for both business and personal use. It offers a range of practical features such as background removal, photo enhancement, image cleanup, and color adjustment, making it ideal for enhancing product images for Shopify stores. With iFoto Photo Editor, updating product information pages becomes effortless, leading to increased customer engagement, improved click-through rates (CTR), and higher rankings on Shopify.
In addition to its Shopify-focused features, iFoto Photo Editor is available as a web-based platform and as iOS/Android applications, providing a seamless image editing experience for users across various scenarios. Renowned as one of the best AI-powered image editing tools available, iFoto Photo Editor has earned a stellar reputation and boasts a large base of loyal users worldwide.
Características principales:
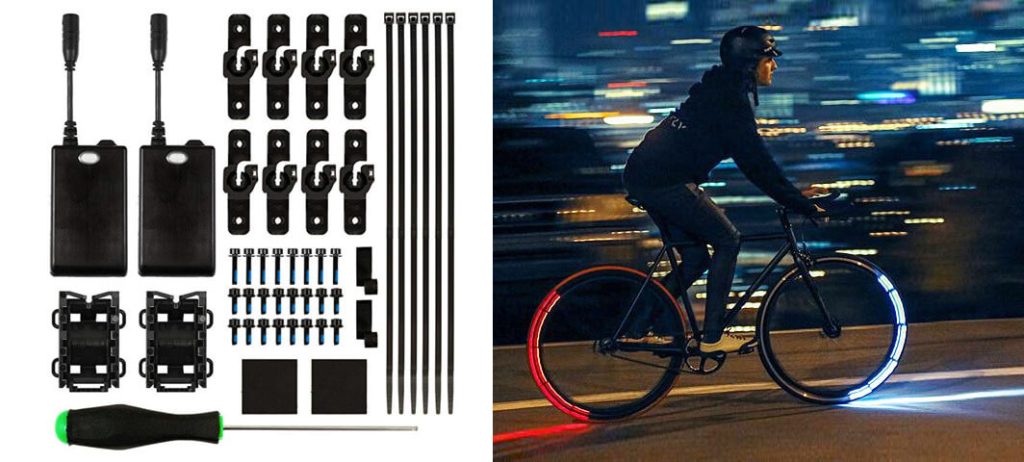
For an extreme example, as shown in the picture below, for the Revolights bicycle light, the left image is a product image, and the right image is a scene image of its use. Which image is more attractive to us?
Creating descriptive, keyword-rich file names. Search engines not only crawl the text on your webpage, but they also search for keywords within your image file names.
Usually, after we take photos with a camera/phone, import the photos into the computer, and the file name of the photo will be a string of alphanumeric characters plus the file extension. Such as DCMIMAGE10.jpg. The first step to optimize the product image before uploading it to Shopify is to change the file name of the image on the computer. For example, change it to: 2012-Ford-Mustang-LX-Red.jpg.
Why? As mentioned above, search engines not only crawl the text on your webpage, but they also search for keywords within your image file names. If the image is named DCMIMAGE10.jpg by default, the search engine cannot know what content is on this image. If it is named 2012-Ford-Mustang-LX-Red.jpg, the search engine will index the keywords in the image name.
So, which of these three names is better: 2012 Red Ford Mustang LX; Ford Mustang LX Red 2012; Red Ford Mustang LX 2012? In my opinion, they are the same, but the article author suggests that you can see which keyword sorting method visitors are using based on website analysis data, and then rename and re-upload the image. Exact matching of customer searches is, of course, better, but I think as long as the product image can be accurately described and the word order is logical, it is sufficient.
In fact, not only for Shopify, but any image should be renamed in this way before uploading, and this should be a habit.
Tips: When naming images, use “-” instead of spaces between words, otherwise, spaces will be replaced by “%20” after the image is uploaded to the server. For example, “2012 Ford Mustang LX Red.jpg” will become “2012%20Ford%20Mustang%20LX%20Red.jpg”.
Also, if you have many images to modify, you can try using a batch file renaming tool to do so.

ALT is the abbreviation of the English word “Alternate”, meaning exchange or replacement. The ALT attribute of an image is a necessary attribute of the image. It is used to replace the image to be displayed in the browser when the image cannot be displayed or the user disables the image display. Suppose the image cannot be viewed due to the following reasons:
When adding a picture, the ALT attribute value of the picture is defined as “Tulip”. When users open the browser to browse, the normal display is a picture of a tulip. If the picture cannot be opened due to network speed issues, the content displayed in the position of the picture is: tulip.
At this time, users know that there is a picture of tulips here, but what the picture looks like specifically can only be imagined.
In addition to helping users understand the content of the image when the image cannot be opened, another important function of ALT is to help search engines better understand the content of the image. The keywords in ALT can help search engines understand the content of the image, so that your image can have a better ranking in search engines, especially image search engines such as Google Image. Therefore, when we talk about image SEO optimization, what we need to do is to add Alt tags to each product image.
Currently, a popular trend in displaying product images is to take some detail pictures of the product from different angles. Therefore, when filling in the Alt attribute of the image, try to fill in a different Alt tag for each image. For example, for the image 2012-Ford-Mustang-LX-Red-Leather-Interior-Trim.jpg, use the Alt tag: alt = “2012 Ford Mustang LX Red Leather Interior Trim”. For another image 2012-Ford-Mustang-LX-Red-Rear-View-Air-Spoiler.jpg, use the Alt tag: alt = “2012 Ford Mustang LX Red Rear View Air Spoiler”.
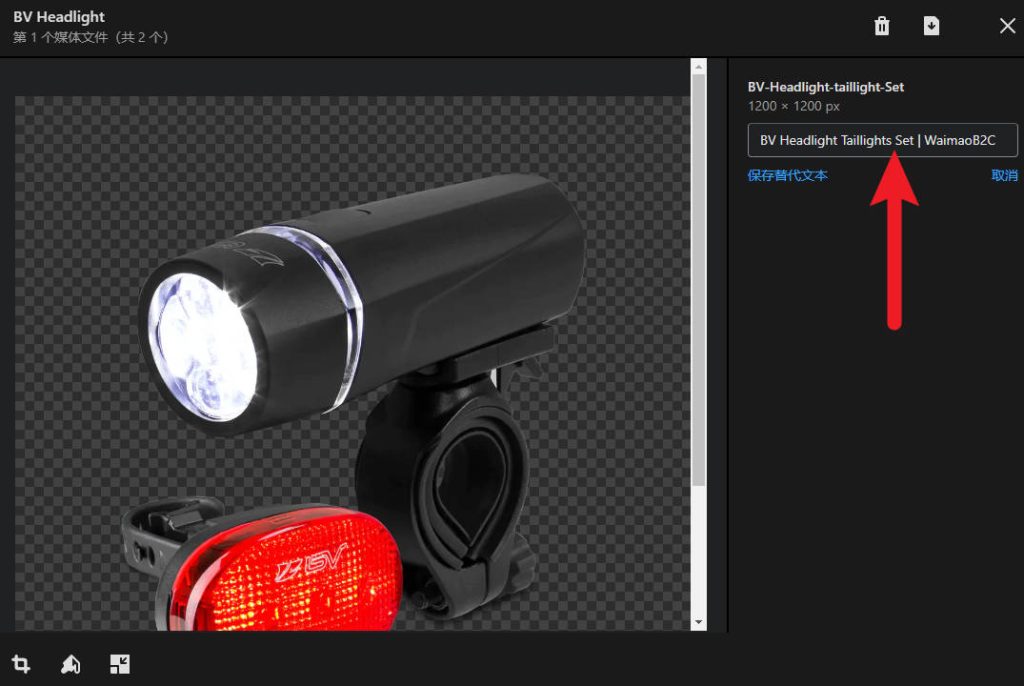
As shown in the figure below, click on the uploaded image, and in the popup window, we can add “alternative text” for the product image. In the ALT setting process, just like when setting the title and description of the Shopify website, do a good job of long-tail keyword mining and layout to get more accurate traffic. Currently, the Shopify system itself does not support online batch addition or editing of ALT content, and can only be added or edited one by one by opening each image, which is still quite cumbersome. We can use a table to add ALT in batches, or search for a suitable plugin by searching “ALT” in the app market to add or edit ALT in batches.
Here are several suggestions from Google’s official website for optimizing images to achieve better rankings (excerpted from some of the suggestions I personally think are more important) The full version of the original text can be found at support.google.com/webmasters/answer/114016.
To increase the visibility of your content in Google Images, prioritize providing an excellent user experience: when designing web pages, focus on users rather than search engines. Here are some suggestions:
In the media file section, the first large image displayed is the main image of the product. When calling and displaying this product information on non-variant product pages, the homepage, product list pages, etc., the default displayed image is this large image. We can manually drag the image we want to set as the main image of the product to the large image position to replace the main image.
At the same time, we can also adjust the position of the image here to modify the display order of various images on the product page frontend.
We can upload videos directly to the Shopify backend or upload videos to YouTube or Vimeo first, and then add the videos to the Shopify backend in an embedded way. I did a simple test, which is to upload a video of about 15MB in size to Shopify and YouTube respectively, and then test the opening speed of the two pages using Webpagetest and PageSpeedInsight without changing the video source. The conclusion is basically no difference.
Although the video we uploaded is 15MB in size, when customers open the page, only the video thumbnail will be loaded, not the entire video file. Only when the customer clicks the play button, the system will start loading and playing the video.
To upload a video to Shopify, the video must meet the following requirements:
As for video resolution, choosing 480P, 720P, 1080P, or 4K is acceptable. The higher the video resolution, the larger the file size. However, when customers watch the video, if the client supports resolution adjustment, the system will automatically decide which resolution to play based on the customer’s network speed. For example, if we upload a 1080P video, customers with slow network speeds may automatically play a 480P video, while those with fast network speeds may automatically play a 1080P video.
If we upload the video to YouTube or Vimeo, there are no such restrictions, but the video we upload must comply with the rules of YouTube or Vimeo.
Similar to modifying the ALT tag content of product images, click on the video on the product editing page, click the options button on the right side of the download button in the popup video editing window, and then click the “Replace Thumbnail” button to upload your own video thumbnail. Note that the size of the thumbnail should also be controlled. While ensuring image clarity, try to keep it below 200KB, the smaller, the better. A file that is too large will affect the loading speed of the website page.
If you insert a video into Shopify products by embedding, currently only YouTube or Vimeo links are supported. Comparing the two, YouTube’s related video recommendations will attract users to leave our website, so Vimeo provides a better experience for us.
The free version of Vimeo has limited video support and limited player style settings. If conditions permit, consider using the paid version.
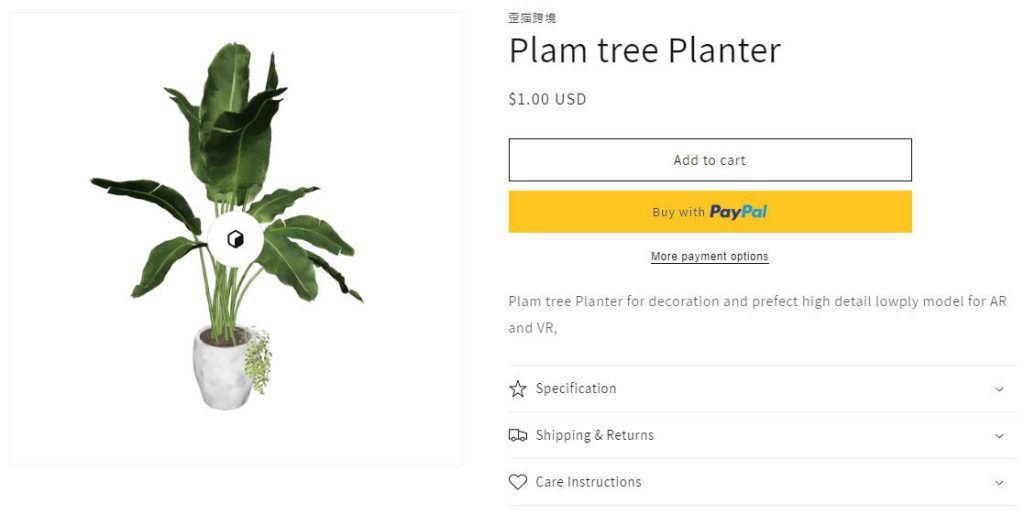
Compared to images and videos, product 3D models can show customers more product information and details. Shopify supports 3D model file types GLB and USDZ, with file sizes not exceeding 500MB. If the 3D model file is larger than 15MB, Shopify will optimize the structure and texture of the model to package the 3D file in a shorter time.
I downloaded a GLB file with a size of 5MB online (sketchfab.com). I checked the page loading waterfall flow in WebPageSpeed, and like the video, the page only loaded a thumbnail of the 3D model automatically generated by the system, so although the GLB file is large, it does not have a particularly large impact on the opening speed of the webpage. Only when customers click the browse button on the model will the system start downloading and loading this 5MB file on the page.
In addition to freely replacing thumbnails like videos, we can also adjust the brightness, background color, default perspective, and lighting environment of the 3D model through the “Edit File” button. The function is quite powerful.
The cost of making 3D models is not cheap, but if it is a single product, or the number of products sold on the entire website is not large, you can consider making 3D models for main products or all products to more comprehensively display product details and advantages and improve the order conversion rate.
I have not used 3D models yet. Those interested can go to the Shopify Experts market or Fiverr to find service providers for a quote and see roughly how much it costs to make 3D models of their products, if it is within the budget, it is worth investing in.