Newsletter Subscribe
Enter your email address below and subscribe to our newsletter
Enter your email address below and subscribe to our newsletter
Free Tools


AI Fashion Models
Showcase outfits on AI models

Cleanup Pictures
Remove unwanted objects
Background Changer
AI generated instant backgrounds

Face Swap
Swap any face instantly

Clothing Recolor
Replace color in 1 click

Image Recopyright
Get reimagine royalty-free photos

Background Remover
Transparent, or any color background

Photo Enhancer
Improve image quality
Download APP
Entrancing and appealing product photography is all you need to elevate your brand and boost your sales.
With the advancing technology, the world of e-commerce is effortlessly available to anyone and everyone these days.
Business owners are elevating their standards by uploading high quality product images on Instagram and websites. While you may think these photos are professionally taken, chance is, a majority of them are not.
By the end of this guide, you’ll know how to establish your own product photography setup in the comfort of your home, and understand how easy it is to achieve top-notch quality photos.
Let’s get started.
The first step is to allot yourself a budget. After that, you can make decisions accordingly and acquire all the equipment you need.
Here is a list of the essentials to help you get started on your product photography setup.
Fortunately, a camera is the most crucial item you’ll need for your product photography setup. You may think that a mobile camera also has the ability to produce high quality photos. However, mobiles will never be able to compete with digital cameras. Here’s why:
Here are a few camera options to consider.
The Sony a7 IV is the best camera for product photography. It has a 33MP full-frame sensor that captures detailed images. It ranges from $2,356 to $5,096 depending on specifications and the chosen memory cards.
If you are looking for something that adds value and is affordable? Go for, the Fujifilm X-T5, offers a great mix of features, at a budget price. The Fujifilm has a smaller APS-C sensor, but sufficient to capture stunning images. It retails at $1699 without the lens, and $2,199 with the basic 80mm lens.
Another feasible option is the Sony a6400, it took the world by storm with its all-rounded features that cater to beginners, as well as expert users. You can get this for $750 to $1200 with added lens, and other modifications.
A tripod will provide you not only stability, but consistency as well. It is a stable platform for your camera which will eliminate the risk of a camera shake, especially when your photos require using lower shutter speed or shooting in low-light conditions.
Using a tripod will ensure consistency in your e-Commerce photography for your catalogue or e-commerce website where uniformity is key.
A tripod will free up your hands for making adjustments to the lighting. It will also help setting up the products while keeping your camera positioned at a set position. This comes in handy especially when you’re working alone.
A good thing about tripods is that they come with universal adjustments that can be attached to any camera. The SILK Pro 700DX Tripod retails at $189 and comes with legs 3-way with a pan and tilt head.
A much cheaper option for beginners would be the AmazonBasics 50-inch Lightweight Camera Tripod for just $20 – why not save up to invest in better Camera Lenses.
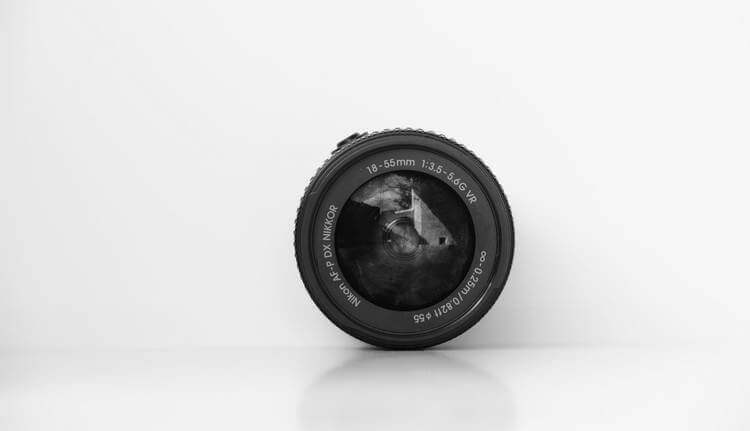
Choosing a suitable lens is an art, different lenses will offer you varied focal lengths. They are also interchangeable which offers flexibility.
Lenses allow you, as a photographer, to capture products with clarity, depth and detail. The right lens will contribute to creating visually appealing images for your products.
The Sony Alpha 70-350mm ($718) lens will provide you with a super clear and zoomed photo. It is lightweight and has fast motion tracking which allowing you to take photos with movements.
Also consider, the Sony FE 24-105mm Zoom Lens retailing at $1,198. It is on the expensive end, but it provides a super zoom ability. It works fast and has precise focusing which will result in a superior quality image of your product.
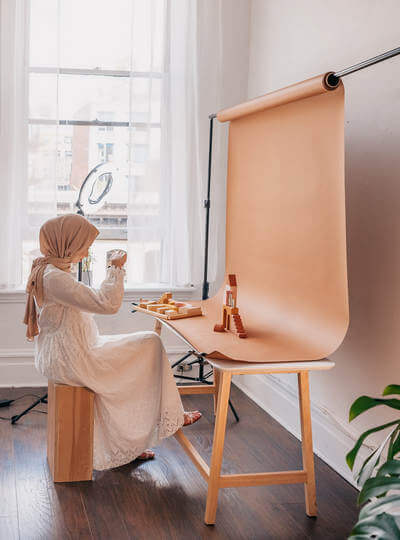
Backdrops provide a clean and distraction-free background for your product photography. It highlights the product without any visual clutter, giving it a professional and consistent look.
They also allow you easier access for post-production in removing backgrounds or adding other elements to your photos.
Choosing the right colors and tones of your backdrop will create a brand aesthetic, enhancing your brand identity.
Pro-tip: For smaller products such as jewelry, use a Light-box. It comes with preinstalled lightning & single tone background, minimizing your setup cost with added ease of shooting.
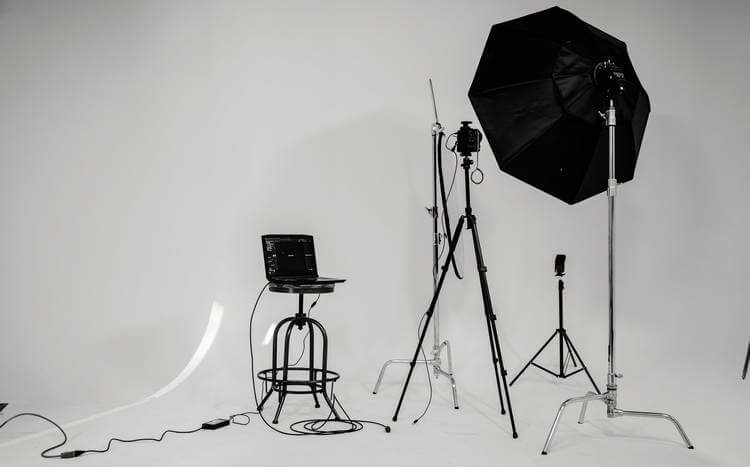
The role of a flash in your product photography studio is to provide controlled or consistent illumination.
This ensures your product is well-lit and visible. It also reduces shadows and distributes equal light across your product. You don’t want unappealing dark images with shadows to turn any potential clients away.
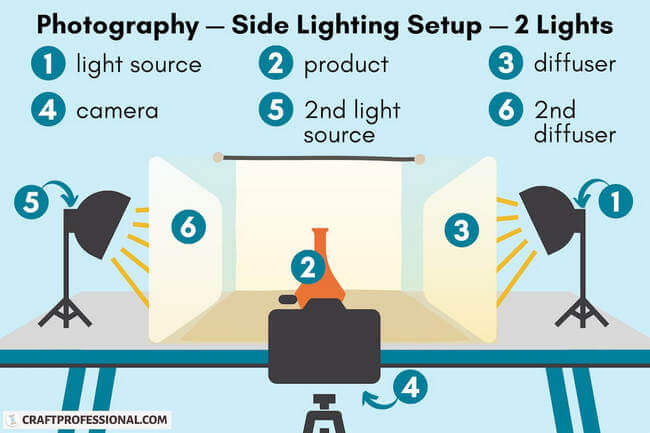
For setting up your DIY photography studio, another essential tool is a diffuser.
Diffusers are translucent materials that are placed over your flash to soften or diffuse any harsh light. This even out the lighting and reduce glare or any unwanted reflections in your product photos.
Did you know that something as small as a diffuser will also help enhance the colours of your product?
Diffusers ensure the product’s hues are rightly captured in photos, making your photos look naturally enhanced. This comes in handy specially for makeup or clothing brands.
As a beginner, you may think that diffusers and reflectors perform the same job, but there is a difference.
A reflector will bounce light back onto your product filling in the shadows of the light, and add soft highlights in your photography studio setup.
Reflectors creates a well-balanced and controlled lighting setup.Furthermore, they make it easier to highlights your product or a specific area of your products by enhancing the overall illumination.
The better your product is displayed, the more customers it attracts because product presentation go hand in hand with brand perception.
The importance of props depends entirely on the type of product you have.
A prop can make or break your product photography, so choose wisely. It can either enhance the appeal of your product or clutter your image and create distractions.
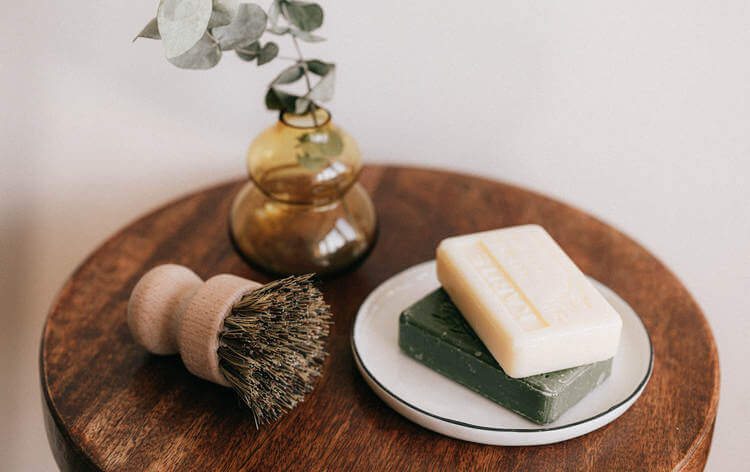
In the image above, you may be able to easily identify the product being sold, it is the soap bar, However, the two small props contribute to the photo well. They are not cluttering the image nor taking away the attention from the soap.
Pro-tip: Always place your product on a small solid colour platform (white in the above picture) to make it stand out more
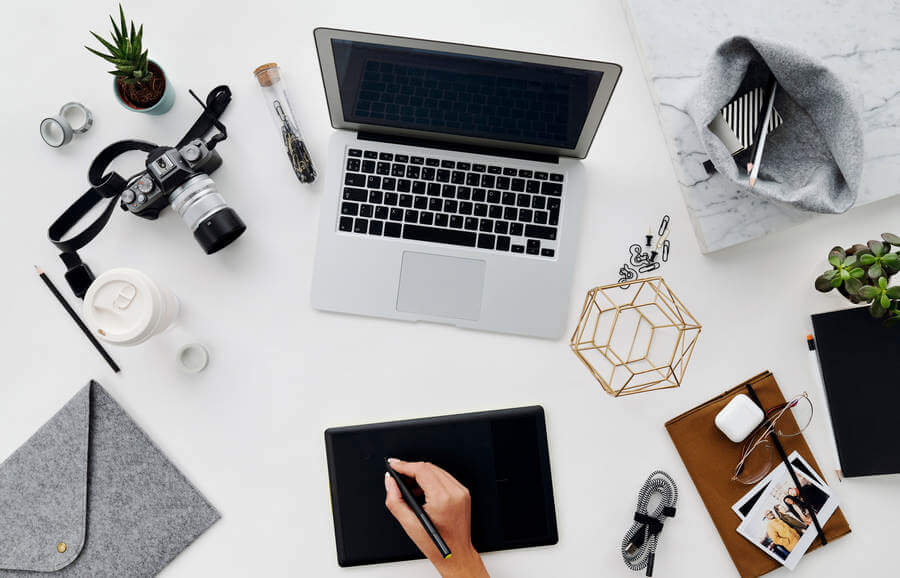
A number of photo retouching apps are available in your phone App Stores these days, however a professional look can only be achieved by using proper editing platforms which are accessible only on a laptop/desktop.
Adobe provides a number of editing software. Photoshop and Lightroom are amongst the top software for photo editing, retouching and colour grading. If you would like to add white background to your photos, you can simply try iFoto. Though not easy to use at first, multiple online tutorials are available for you to get a grasp on the basics of editing.
Make sure your laptop is strong enough to easily run these software. Bottom lines specifications required include an 8GB RAM, with at least 512 TB of SSD/HDD (Solid State Drive/ Hard Disk Drive).
Exporting and uploading data can be another hassle altogether.
Invest in a trusty Hard Disk Drive or a Solid State Drive and save yourself the hassle of hours of uploading onto online clouds platforms.
Hard Drives offers easy access to large files, and are a cheaper alternative to cloud based storage per GB.
The only downside to hard drives is that it limits your files sharing capabilities with your employees.
Now, you have your photography studio setup, however, product photography in itself is a major task to perform. Keep these 5 extremely valuable tips in mind, you’ll progress through your journey effortlessly. Lets dive right in.
Research! Research your market and your audience regarding the product that you’re selling. Look at similar brands, their photos, their USPs (Unique Selling Points) and what appeals to their customers.
Especially, Pay attention to the detail in the photography of their products and take inspiration.
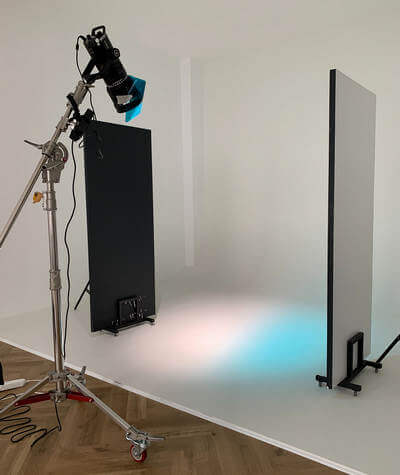
Make sure there is consistent, diffused lighting to minimise any harsh shadows or highlights in your photos to give a professional outlook. To achieve this, experiment with different modes and moods of lighting; for example, natural lighting, studio lights or flashes.

Product photos should be well-lit and in focus. The viewer should easily be able to tell what he/she is buying. As a general rule, the more detailed, the better it looks.
Added note: Always account for the shape and size of the product before setting up the direction of the light. Experiment to find out which works best for your product.
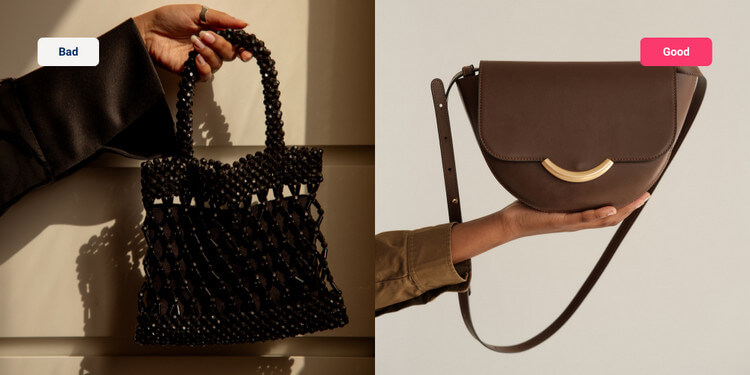
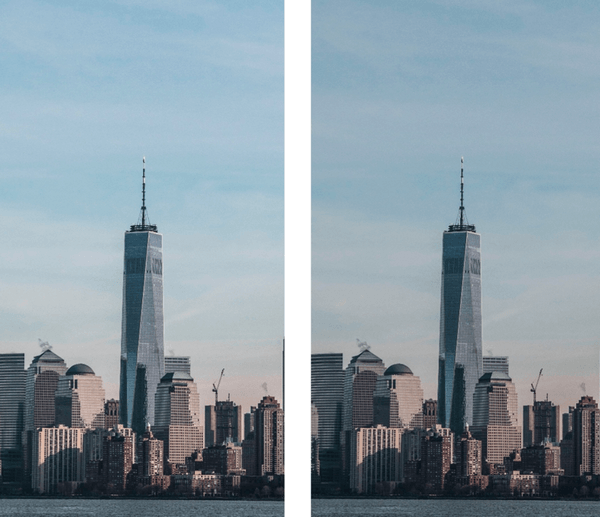
Wouldn’t you agree that the image on the right looks way more professional than the one on the left?
Always opt for a clean and clutter-free backdrop. A backdrop chosen in colour complementing the product or creating instant contrast work best to make the product appear high-end.
Use the right colours and tones that complement your product and match your brand’s aesthetic.
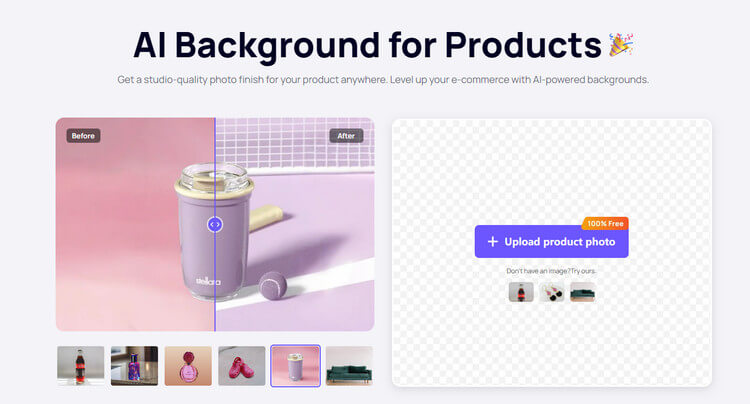
Get a studio-quality photo finish for your product anywhere. Level up your e-commerce with AI-powered backgrounds.
Remember to capture close-up shots of your product to highlight the intricate details and textures of your products. You should know how to showcase the product from different angles to provide an inclusive view to the buyer.
Always highlight the unique selling points of your product and attract the wanted attention.
In case of a handbag, makeup, shoes etc, show your product in use. This will demonstrate its functionality and add a lot of context to your buyers. It will help them visualise how they can use the product in their own lives.
The wrong composition can really make an image unappealing. The composition of an image shows how professional or unprofessional the work is.
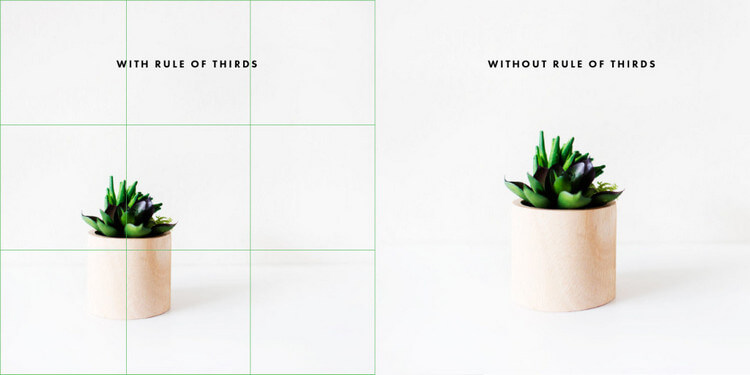
Make sure to follow the rule of thirds/another of your choice for a perfectly balanced and desired composition.
The rule of thirds suggests putting your main subject on the grid lines where they intersect. In the image above, the plant is placed along the left grid line, where the two horizontal and vertical lines cross. This will ensure symmetry in your photo resulting in a visually appealing and organised shot.
Another composition tip is to experiment with leaving intentional empty spaces in your image to draw attention to the main subject in your photo.
Similarly, be mindful of your depth of field. Adjust the aperture in your lens to control the depth of field. This will help you control whether the background is in focus or the foreground (where your product lies).

Setting up your camera for DIY product photography can be overwhelming for beginners as there are a lot of things that can easily go wrong. With these simple steps, you can set up your camera swiftly and ensure top-notch quality photos in your product photography setup.
Work with a professional camera, a DSLR or a mirrorless camera rather than a mobile phone camera for more control over settings and better image quality.
You should use a lens with a focal length that suits your product and your studio space. For general product photography, a prime lens with a mid-range focal length is used (50mm).
The aperture of a lens is parallel to the iris of an eye. It refers to the diaphragm through which light passes, just like the opening and closing of an eye (iris). The measuring unit is f/ with numbers; e.g., 1.2, 2, 2.8 etc.
Choose a mid-range aperture of f/8 to f/11 for a good balance of sharpness and a blurry backdrop (depth of field). You may adjust the aperture according to the size of the product and the desired blur you want.
Shutter speed is the time of how fast the shutter closes and opens.
Light is inversely proportional to the shutter speed of your camera. Less light will display in your image if the shutter speed is quicker.
Choose a relatively slower shutter speed of 1/60 for still products, with your camera set up on a tripod.
ISO is your image sensitivity setting. It makes your camera sensitive to light. Aperture, Shutter speed and ISO are three vital elements that are interlinked and must be set perfectly.
The image on the left is taken with a lower ISO than the one on the right. The latter is grainy, dull and minimises the colours of the subjects in frame.
You may set the ISO to the lowest value of a 100 or 200, which is perfect for a studio setting and it will maintain your image quality and reduce the chance of a grainy photo.
The white balance stabilises the colour of the light. It adjusts the temperature from warm to cool, as you want it.
Setting the white balance differs for every lighting condition. You can use the auto white balance or manually adjust it for accurate display of the colours of your product.
You may use a manual focus for more control, especially when you’re capturing smaller, more intricate product details.
This can be set up mechanically on the camera, denoted by ‘AF’ and ‘MF’.
Invest in a good sturdy tripod and utilise it to prevent your camera from shaking, resulting in blurry images.
Now that you have taken all the desired photos of your products, it is time for the editing and retouching.
This is one of the most important steps because it will enhance the visual appeal of your product images, by correcting any mistakes and flaws in your image.
You can easily colour correct, add or remove backdrops, colour grade your image for accuracy and a more polished, professional look.
Although Adobe Photoshop does the job of editing your photos and removing the backdrop, it can be a challenging software to use for beginners. An easier and cheaper alternative is iFoto. You can access it online and for free.
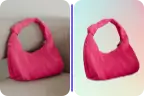
iFoto’s free background remover helps remove backdrops which puts your product image into isolated focus. Follow the following steps to remove background:
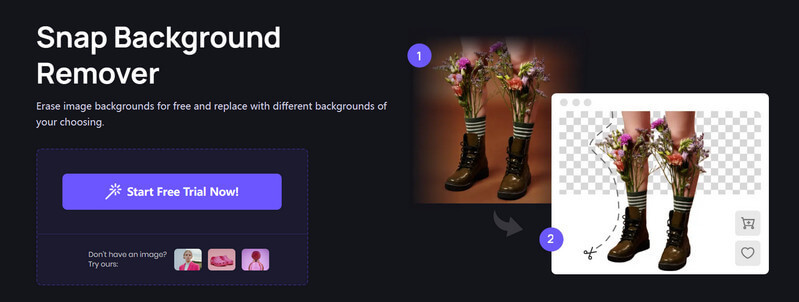
Add the photo of choice, and iFoto will automatically remove the background from the photo. However, the neatness of removal will depend on the picture quality.


After you have removed the background, you are given infinite options to add a backdrop of a color of your choice – preferably choose a color that will match your brand’s identity and aesthetic.
If you want to add a backdrop to your product image, you can visit AI Background for Products. It allows you to browse through thousands of backgrounds that may match your product aesthetic.
Choose from ranging varieties of backdrops, including different textures such as wood, marble or pastel. You can choose between solid colors, patterns, nature backgrounds and studio scenes too.
Big studio size is only relevant when handling bigger project where you need to change sets for different scenes. Generally, a standard studio can accommodate model shoots, jewelry shoots etc. You would need a much smaller studio, something like a lightbox would be sufficient if the products you’re shooting is jewelry.
Another aspect is the extent of equipment you need. If you have an all purpose studio, you’ll need a bigger setup compared to a specialised shooting studio.
Your team plays a much more significant role in the studio’s success rather than one’s personal excellency. Setting up a product photography studio requires a combination of planning, investment and execution. While photography does require some basic rules and regulations, it is not difficult for an amateur to setup a photography studio.
It may cost a bit, but you can make the process more affordable by using iFoto editing tools.

With iFoto, you don’t need to be a professional graphic designer or photographer to create stunning images. iFoto’s intuitive interface makes it easy for anyone to edit images with just a few clicks.
iFoto offers a range of powerful editing tools that can help you generate AI fashion models, remove backgrounds, or generate realistic backgrounds to give your images a unique look.
Even if you don’t set up a photography studio, you can use iFoto to generate lifelike backgrounds for your fashion models with just one click.
Setting up a home product photography studio is accessible to all. Equip yourself with a suitable camera and essential tools like diffusers and tripods. Dedicate a space for your studio, master lighting techniques, experiment with compositions, and embrace post-processing for polished results.
With passion and commitment, you can transform your space into a professional studio for capturing professional product images for your brand. Remember, even the experts started as beginners. As long as you have the right tools, you are good to go.