Assinatura do boletim informativo
Digite seu endereço de e-mail abaixo e assine nosso boletim informativo
Digite seu endereço de e-mail abaixo e assine nosso boletim informativo
Ferramentas gratuitas


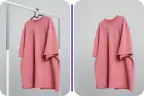
Modelos de moda com IA
Exiba roupas em modelos de IA
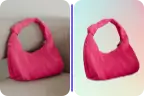
Fotos de limpeza
Remover objetos indesejados
Alterador de plano de fundo
Planos de fundo instantâneos gerados por IA
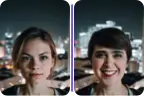
Troca de rosto
Troque qualquer rosto instantaneamente
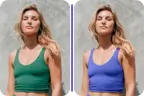
Recolorir roupas
Substitua a cor em um clique

Direitos autorais da imagem
Obtenha fotos livres de royalties do reimagine

Removedor de plano de fundo
Fundo transparente ou de qualquer cor

Aprimorador de fotos
Melhorar a qualidade da imagem
Baixar o aplicativo
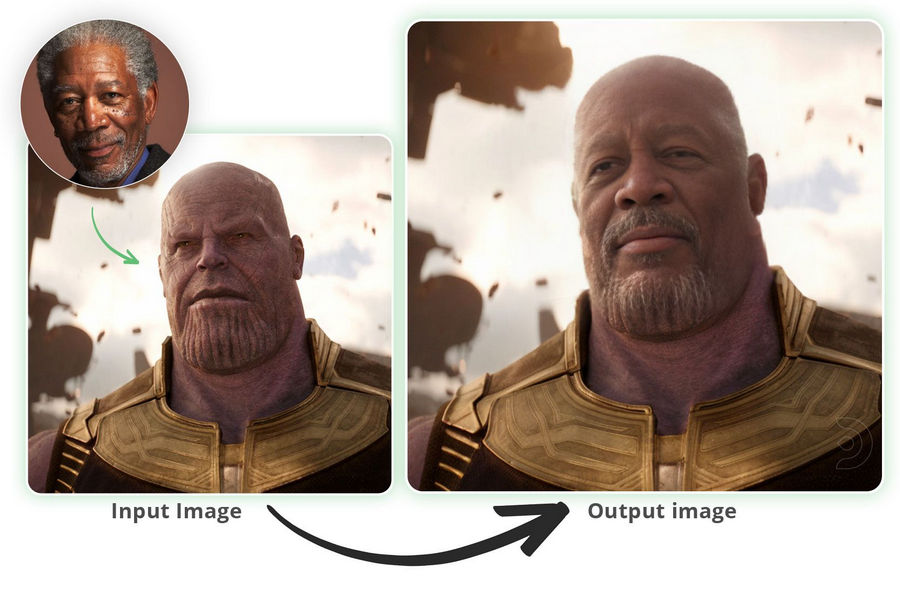
AI models like Stable Diffusion have certainly changed the way we edit images these days. Apart from creating new visuals, you can also use its extensions to do specific high-level editing tasks. For instance, with the help of Stable Diffusion face swap extensions like ReActor or Roop, you can easily swap faces in your pictures. In this post, I will let you know how to face swap in Stable Diffusion by using one of its most popular extensions, ReActor. Let’s begin!
Before we take a deep dive and explore a stepwise guide on how to face swap in Stable Diffusion, let’s cover some basics.
Difusão Estável
If you are into graphic designing or editing, then you must have heard of Stable Diffusion. Developed by Stability AI, it is a generative AI model that creates realistic images by gradually refining a random noise input.
It works by repeatedly applying small changes to the initial noise, adjusting it to match the characteristics of a target image. This process, called diffusion, ensures stable and coherent image generation and is used to create high-quality, realistic images with customized details.
ReActor Extension
Now, ReActor is one of the most popular web extensions that enhances and customizes the Stable Diffusion AI model. In a nutshell, it enables users to dynamically modify the generated images in real-time, influencing various aspects like colors, textures, and shapes. That’s why the model can be used to create more personalized outputs by leveraging the power of Stable Diffusion.
Mostly, the ReActor face swap feature has gained popularity as it is freely available and yields exceptional results.
Since Stable Diffusion is an open-source model, using it is free, but it can be a bit complicated. To learn how to face swap in Stable Diffusion using the ReActor extension, you have to follow these steps:
Step 1: Install and set up the ReActor extension
First, you have to install this Stable Diffusion face swap extension on any popular web UI, like Automatic1111 or ComfyUI. In this post, I have considered the example of Automatic1111 as it is the most popular Stable Diffusion web UI.
You can go to your Automatic111 interface and visit Extensions > Install from URL section. Here, you need to enter the GitHub URL of the ReActor extension, which is: https://github.com/Gourieff/sd-webui-reactor
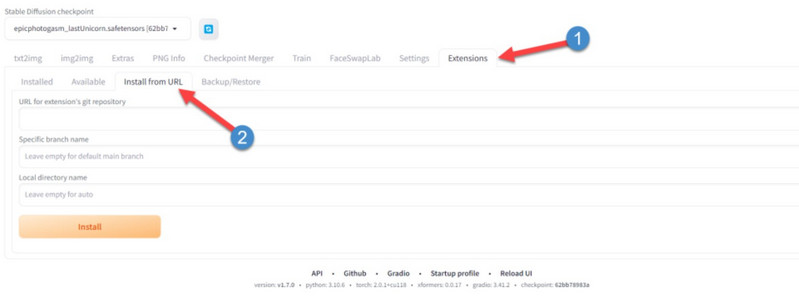
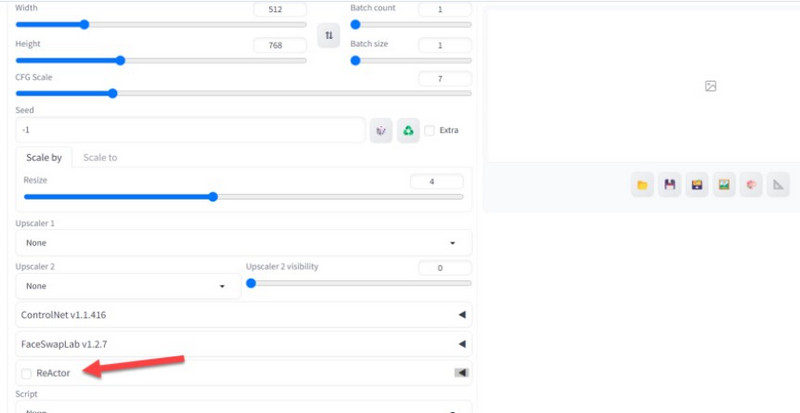
Simply wait for a while as Automatic111 loads the necessary components of the ReActor extension to your account. Once that is done, you can go to the txt2img tab on your Automatic111 interface and enable the “ReActor” extension to work.
Step 2: Upload the images you want to face swap
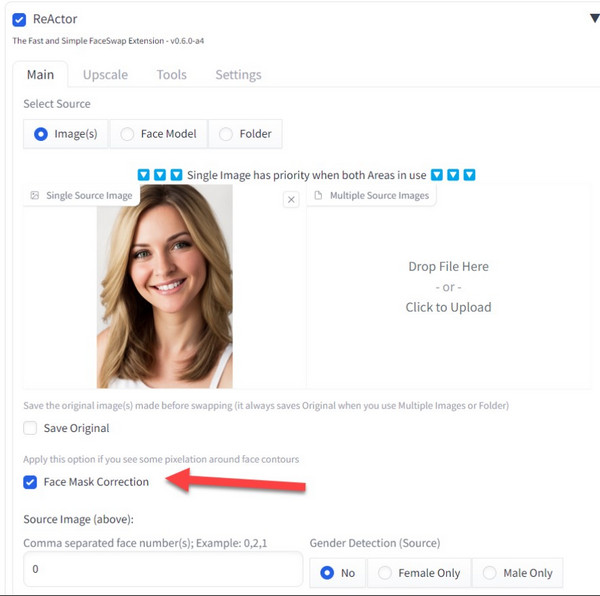
After the ReActor extension is enabled, you can simply access it on your Automatic111 interface. Now, to use the ReActor face swap feature, you can go to its “Main” section and upload your images. First, you have to upload the image from which the face cutout has to be done (on the left).
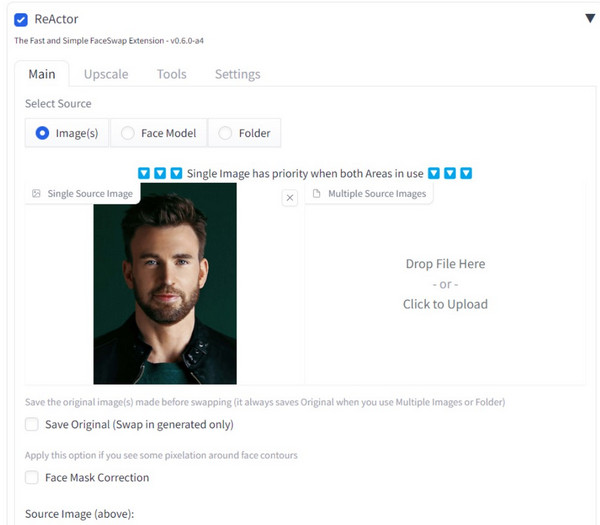
Now, click on the add icon and upload the target image. That is, the image on which the cut-out face would be pasted.
Step 3: Swap faces using the ReActor extension
Once you have uploaded the images, scroll a little and make sure the “Face Mask Correction” feature is enabled, which will automatically correct any glitches in the output image. Also, go to the “Restore Face” section and select the “CodeFormer” option from here.
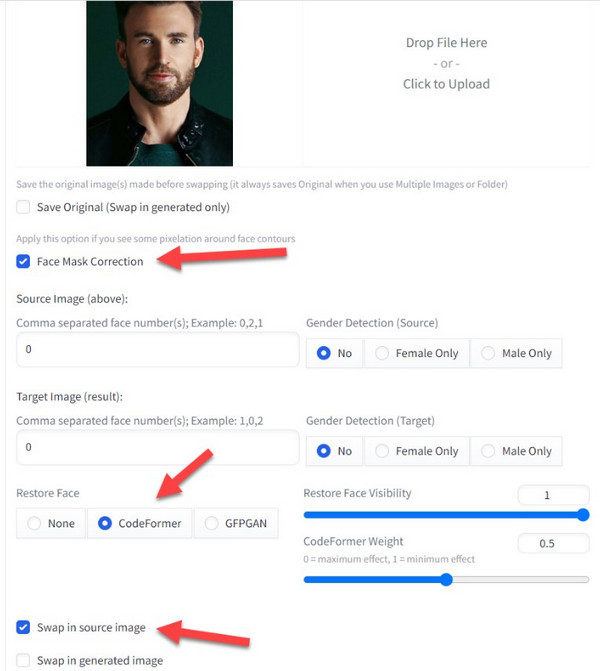
Lastly, you just have to enable the “Swap in Source Image” option to let the app know that the source image has to be swapped. Once that is done, you need to scroll a little and set the denoising strength to a low value (I would recommend somewhere around 0.125-0.25) to get the desired results.
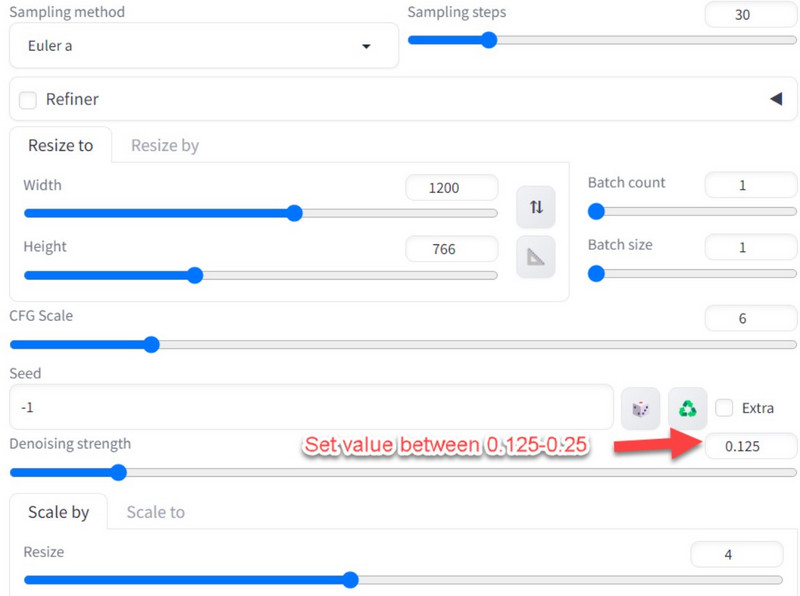
Now, you can simply customize other parameters like the image size, number of steps, CFG scale, etc. as per your choice. I recommend playing around with these settings to get customized results. Lastly, just click on the “Generate” button and simply wait for a while as the Stable Diffusion face swap tool produces the desired output.

You can review the results and download the generated image on your system. If you are not satisfied, then you can simply change the denoise level, number of steps, sample style, and so on.
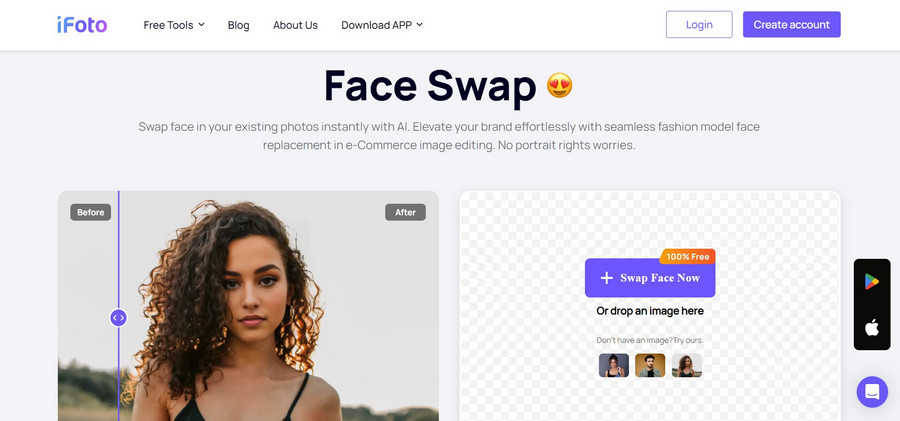
Como você pode ver, aprender how to face swap in Stable Diffusion is quite tedious and it doesn’t even produce desired results at times. To simplify the entire process and get better results, you can consider using iFoto Face Swap, which is a more advanced AI solution to swap faces.
Compared to the ReActor face swap tool, most people prefer using an advanced AI solution like iFoto Face Swap pelos seguintes motivos:
Easier to use
With Stable Diffusion’s web UI, you have to undergo a list of tasks and iterations to get the desired results. It is also complicated to set up ReActor on other web portals while iFoto is super-easy to use and needs no learning curve.
Consistent results
Most users have observed that Stable Diffusion yields inconsistent results even when we supply the same parameters. On the other hand, you can get instant, precise, and consistent results with iFoto. If you want, you can even select any model for your brand from its list of AI models.
No manual efforts
There is no need to set up scales, number of steps, and other details on iFoto (unlike Stable Diffusion). Simply upload your pictures and get the desired results – it is as simple as that.
Time-saving
O ReActor face swap can sometimes take a lot of time (even minutes) and might get stuck in between as well. With iFoto, you get instant results without any technical hassle.
Templates available
You can make use of the wide range of templates that are available on iFoto Face Swap. For instance, you can swap faces with a preferred model of different gender, age, ethnicity, etc.
Other features
Apart from Face Swap, the iFoto Studio also offers a wide range of tools – including background remover, AI model generator, color changer, and so on.
With iFoto, you don’t need to go through unwanted hassle like we did while learning how to face swap in Stabe Diffusion. By following this simple three-step approach, you can instantly swap faces using iFoto Face Swap.
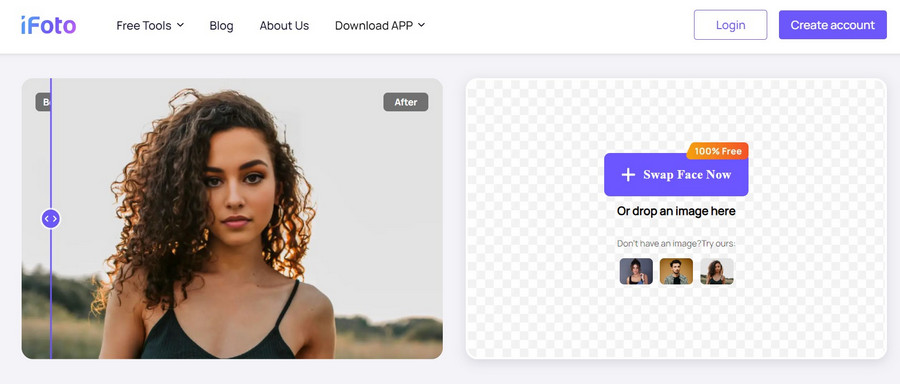
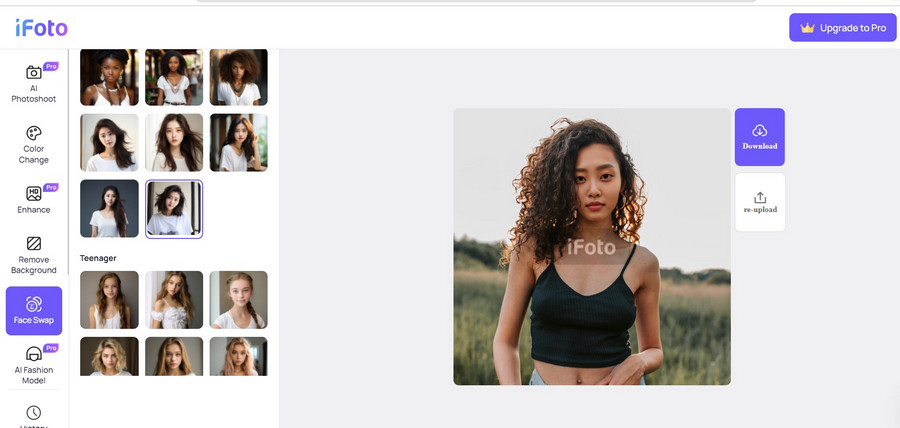
Step 1: Upload the target image
You can start by visiting the website or the mobile app of iFoto Face Swap. Now, you can either drag and drop your target photo to the interface or browse it from the system. Remember, this is the target photo on which the new face would be applied.
Step 2: Select the face to be cut out
After uploading your photo, you can preview it on iFoto’s interface. On the sidebar, you can get an extensive display of AI models categorized based on their gender, age, and ethnicity. To get instant results, you can simply select any AI model image from the side.
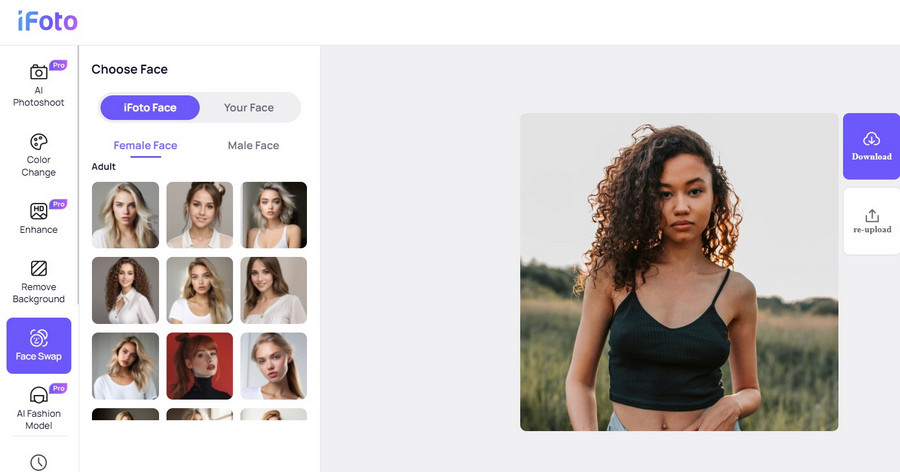
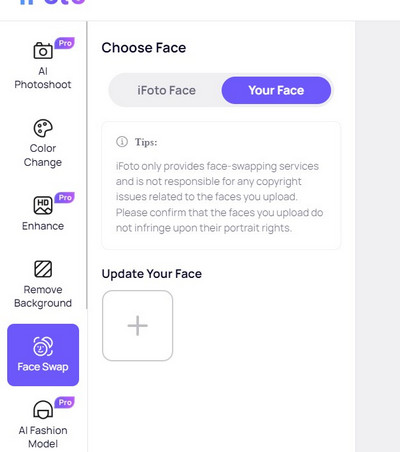
Alternatively, you can upload any image from which the tool will cut out the face. For this, go to the “Your Face” option in the sidebar, click on the add icon, and choose to manually upload the image of your choice.
Etapa 3: salve a imagem editada
That’s it! Once you select the image, iFoto will automatically cut out the face from it and apply it to the target image.
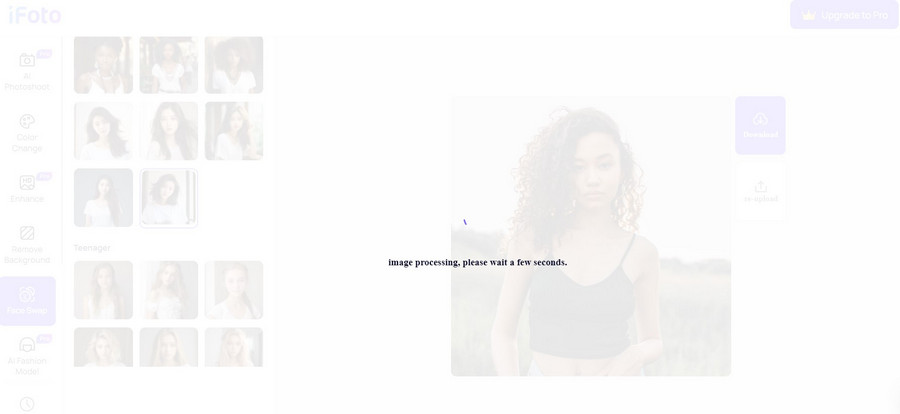
You can now preview the results and save the edited photo from iFoto to your local storage.
Stable Diffusion has certainly come a long way since its release and now can be used to do so much more! For instance, you can easily follow this guide and learn how to face swap in Stable Diffusion using the ReActor extension. Since the ReActor face swap tool is quite complicated to use and provides inconsistent results, you can consider using iFoto Face Swap. It lets us swap faces in photos without any manual effort and generates highly realistic, precise results that you can readily use as per your requirements.