订阅时事通讯
请在下方输入您的电子邮件地址并订阅我们的时事通讯
请在下方输入您的电子邮件地址并订阅我们的时事通讯

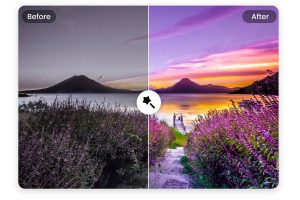
Have you ever taken a photo that didn’t look as sharp as you wanted? The subjects might seem a little blurry, or the overall quality might not be as lovely as pictures from professional photographers. Keeping your images clear and crisp is essential for sharing memorable moments. Luckily, there are now easy ways to improve picture clarity using photo editing apps on your phone or computer.
In this guide, we’ll first talk about what makes an image look clear versus blurry. Then, we’ll explore some common issues that can cause pictures to lack sharpness. I’ll show you simple tools to enhance your photos with just a few taps. By the end, you’ll know how to transform average snaps into high-quality portraits you’re proud to show. So whether you want family photos that pop or travel shots that transport people to your destination, keep reading for clarity tricks anyone can use!
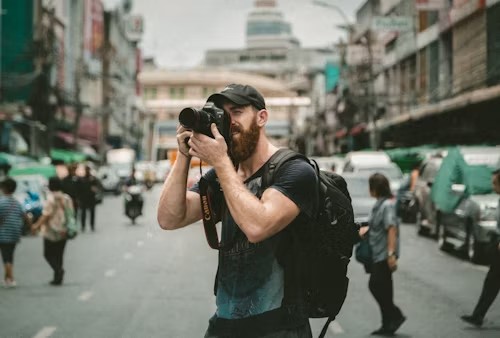
Getting your subject in sharp focus is one of the most critical aspects of a clear picture. However, achieving precise focus can be challenging, especially with moving or unpredictable subjects like children and pets. Their eyes may not land where expected, just as you take the shot. Changing light levels also influence autofocus performance, with screens hunting more in low-contrast situations.
Continuous autofocus tracking while panning the camera allows the lens to focus on a moving subject. You can also prefocus where the subject is likely to be and use a deeper depth of field at a slightly stopped-down aperture setting to increase the focus zone. For stationary subjects, carefully composing shots using autofocus points rather than always focusing in the center yields keener sharpness on the intended item.
An image’s resolution, or pixel count, affects how fine details appear at larger sizes. Higher resolution cameras, with 24 megapixels or more, enable magnified prints containing more precise edges and textures. However, if only posting or sending a low-resolution web-size JPG, the photo will look soft and lack sharpness compared to the original.
Downsizing compresses information, leading to a muddier result. It’s always best to share or print from the full-resolution files straight from the memory card. Even with a 12MP sensor, the RAW files preserve sufficient data for sharp enlargements without generation loss from repeated resizing.
Digital noise presents as a speckled, grainy appearance that clouds clarity. It tends to emerge more in dim conditions since higher camera sensitivities are required to expose the shot correctly. Noise also creeps in with extended exposures and high ISO settings, a product of thermal sensor heating over time.
Fast, unstabilized hands while pressing the shutter can mechanically introduce blur. Using a tripod, faster shutter speeds, and lower ISO assistance produces cleaner snapshots with richer details. Noise reduction tools help somewhat, but prevention through capable equipment and stable shooting position yields the sharpest low-light photographs.
When saving or sharing images, various forms of compression are often applied to reduce file sizes. While helpful in uploading and transferring photos online or via messaging apps, high amounts of compression strip away valuable clarity over time.
Each additional round of squeezing degrades the results further. It’s advisable to maintain original files losslessly on storage. Instead of wasting particulars to excessive file crunching, you’ll retain all captured subtleties. Even when posting to social media, always export at minimum web quality levels to avoid discarding too much integrity from the photography. Well-archived, full-size snapshots preserve ultimate crispness.
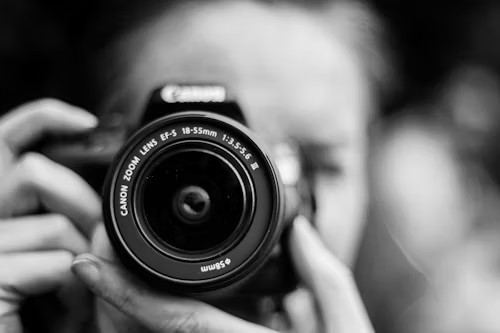
Poor quality or damaged lenses interfere with incoming light rays, adding unwanted veils that muddy clarity. Imperfections like dirt smudges, scratches, and molds scattered light chaotically instead of concentrating crisply on the image sensor.
Cheaper conventional lenses may also not be as optically outstanding overall, lacking the resolution and consistency of improved glass. It’s worth keeping lenses clean inside and out, as well as both front and rear elements, using proper tools. Quality brand-name prime lenses, with their wide apertures and precision elements, tend to produce the sharpest photos when conditions, shooting technique, and camera are well-controlled.
Getting clear, sharp photos comes down to a few key things. Making sure your subject is in focus is essential. But it can be tricky, so practice techniques like focusing on autofocus points instead of the center.
You’ll also want high-quality pictures that show all the details, so use the best resolution your camera allows. And don’t compress photos too much when sharing since that can make them look blurry. Lighting is also crucial – low light means using a steady grip and lower noise settings.
Your lenses should be crystal clear, so keep them smudge-free inside and out. With a bit of attention to these basics – focus, resolution, noise, lighting, and clean glass – your photos will surely pack plenty of visual punch and bring subjects into a beautiful, crisp view. Then everyone can appreciate all the ins and outs ideally.

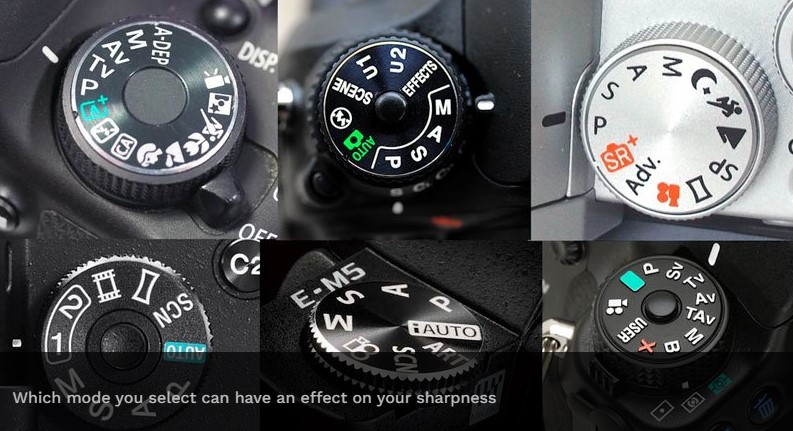
Three fundamental photo controls directly impact image clarity: aperture, shutter speed, and ISO. Aperture refers to the opening in the lens that controls depth of field and light entry. Wider apertures between f/1.4-f/5.6 produce softer focus, while smaller f-stops like f/8-f/16 yield more excellent sharpness across the frame.
Shutter speed sets the duration of light exposure—faster speeds freeze action but require higher ISOs in low light. ISO increases light sensitivity but introduces image noise at higher levels. Balancing these elements ensures you capture sharp photos in different lighting conditions without unwanted blur or grain.
Several photo editing programs make improving clarity easy and effective. Two popular options are Adobe Photoshop and the iFoto Photo Enhancer app.
Adjusting your camera can help produce more precise shots. Ensuring focus is set to a single point rather than a wide area locks onto subjects. Higher apertures between f/8-f/11 provide depth of field for sharp foreground to background. Increased ISO improves lighting in dim scenes but adds noise, so use a tripod instead when possible.

The optics are just as crucial as the body. Quality glass constructs sharp images with high resolution. Lenses from reputable brands stabilize clarity even in low light. Zoom lenses sacrifice some clarity, so primes offer superior sharpness. Lens filters like UV can subtly degrade quality, so use them sparingly if needed. Changing camera lenses provides more creative control over focus.
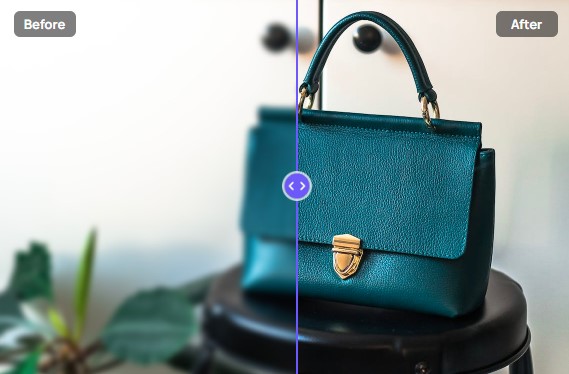
Using AI image analysis, the iFoto app boosts focus and reduces digital noise with a single tap. It examines photos on a pixel level, intelligently detecting areas for enhancement like textures, edges, and gradients. Proprietary algorithms then optimally apply adjustments tailored to each photo’s unique characteristics.
Within moments, grainy areas smooth out while colors, contrast, and shadows appear balanced for a more precise, more polished result.

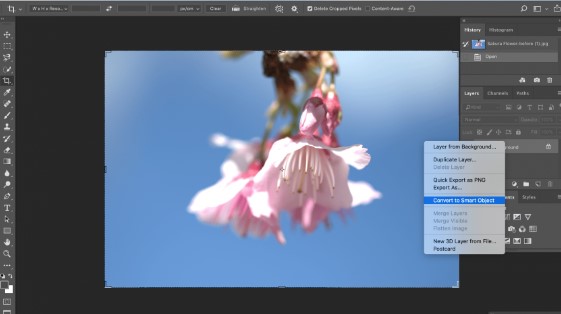
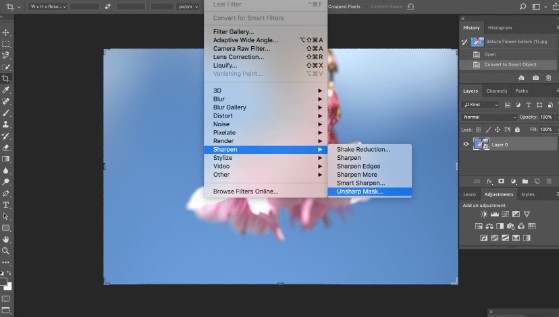
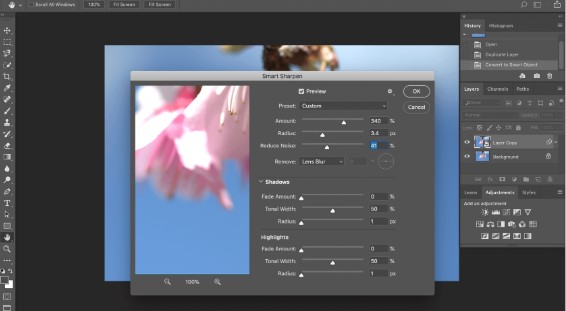
Adobe Photoshop is a powerful editor that allows granular sharpness adjustments. Within Photoshop, the Sharpen filter enhances micro-contrast along edges to define details, while the Unsharp Mask is non-destructive and preferred for significant adjustments. Both tools use sliders to control the Radius of tones affected and the overall amount of sharpening applied. For subtle tweaks, a Radius of 0.5-1 pixel works well. Significant improvements may require 1.5-3 pixels but risk creating halos—careful previewing is essential.
You can also apply sharpening selectively using layer masks and painting with black or white. Only address specific areas needing attention, like faces, for natural results. Focus areas with high-frequency edges, like hair or text, often benefit most. With practice, these tools give precise control over sharpness without damaging images.
The Sharpen filter increases contrast along edge transitions to make objects appear more delineated. It has sliders to control radius and amount, with radius defining the range of tones affected and the amount setting the intensity. For significant adjustments, the Unsharp Mask is better and has identical controls. Both tools can create halos if overdone, so fine-tuning the settings is essential. Lower radii like 0.5-1 pixel work best for subtle improvements without artifacts.
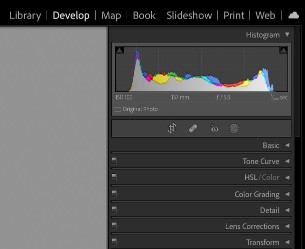
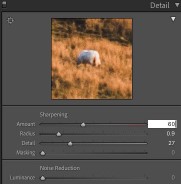
Lightroom is versatile photo management software suitable for novices and professionals. Its Clarity slider enhances texture and micro-contrast without sharpening halos often found in other editors. Lightroom offers powerful tools to improve clarity and focus. The Clarity slider enhances local mid-tone contrast, highlighting subtle texture and details. For minor adjustments, a value between 5-10 works well.
You can also use Masking to apply clarity selectively. Create a mask by holding Alt/Option and adjusting the Clarity slider to brush in effects where wanted. Areas like tree bark and skin benefit most from clarity.
Other useful sliders include Dehaze, which lifts fogginess, and Sharpening. Dehaze under 15 will avoid an artificial look. Sharpening above 25 can cause halos, so preview at 100% zoom. The Detail panel also has Sliders for Noise Reduction and Contrast.
Taking test shots at various settings allows for comparing results side by side on a calibrated monitor. Practice finding the ideal mix of tools for different subjects. More advanced features let photographers customize settings to specific scene types or subject matter. Plus, batch editing tools streamline projects involving multiple images at once.

Mastering the keys to clear, well-defined images empowers you to capture your creative visions with impact. While some factors like light, lenses, or focus rely on equipment, today’s innovative photo editors provide powerful yet easy clarity solutions.
This guide explored common culprits behind blurred or pixelated photos, like soft focus, noise, and low resolution. You then learned how Adobe, Apple, and iFoto programs use artificial intelligence to intelligently enhance sharpness, detail, and clarity through simple, automatic tools. Whether automatically optimizing an entire library or making nuanced tweaks, these applications help enthusiasts and professionals quickly refine images.